August 19, 2020
5 Tips to Help you take Better Photos
Do you struggle with taking good photos? Don’t worry, we have 5 simple tips to help you improve your photography and have memories that will last a lifetime!
#1: Apply the rule of thirds to your photos.
Learning the Rule of Thirds is one of the most important things you can learn, and the best part is – it’s easy and can be applied almost anywhere! The Rule of Thirds is simple, you want to make sure that the object is not directly in the middle, but is aligned somewhere towards the sides. This means that the object hits one of the intersection points. The reason that we should use the Rule of Thirds in our photos is because it makes the photo more visually appealing and also makes it easier for the viewer to find it engaging.
Expert Tip: If you’re using an iPhone you can turn on your GRID by simply clicking Settings -> Photos & Camera -> and turn on the GRID feature.
Let’s take a look at a few examples of the Rule of Thirds in action:
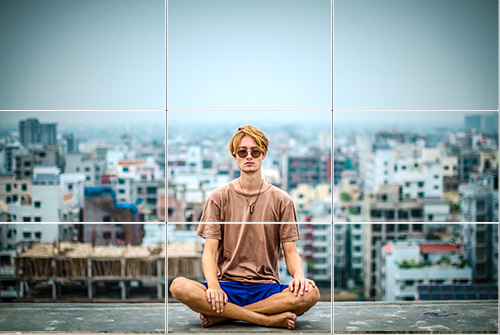
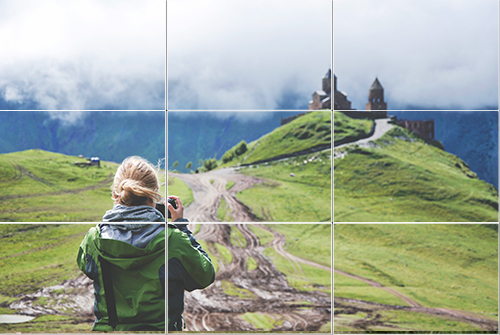
These two photos are both taken while traveling, but the photo taken with the Rule of Thirds in mind is more engaging and compelling to look at. Though the photo on the top has a wonderful background, it places the focus in the middle which can be distracting for some. But, both of the photos have a wonderful story to tell, so it’s up to you as the photographer to play around with the Rule of Thirds. Remember, the Rule of Thirds is something for you to consider while taking photos, but there are some instances when placing the object of focus in the middle may work better.
#2: Use Natural Lighting
When taking photos, remember that natural lighting is the most important thing to utilize as it can make a huge difference. What I like to do is place the object I’m photographing in front of a large window on a gloomy day and then open up the drapes so that natural light can get in. Something so little can make a huge difference when it comes to the finished product, half the time I don’t even need to edit my photo!
Don’t believe us? Take a look at these two photos:
Although the photo on the left has a softer feel to it, the photo on the right pops due to the vibrant colors. It looks like I edited the photo to increase the saturation, but both of the photos were unedited!
Pro Tip: Make sure to take your photos in front of a window or on a cloudy day where there is not too much direct light shining down on your object.
#3: Don’t zoom in, crop in!
When you’re taking photos, it’s hard to resist the urge to zoom in, especially if the object is hard to reach. But, unless you have a DSLR that has a specific lens for zooming in, it’s better to walk up to the object and snap the photo. When you use the optical zoom on your phone, the photo is more likely to be blurry and focusing on the object may be harder.
If you think the photo looks too busy, then you can go and crop the photo, which will help you choose what stays inside the photo and what gets cropped out.
#4: Trick for using your phone camera: increase your brightness with one swipe.
Here’s a nifty trick for those of you who have an iPhone, increase the brightness by tapping the photo and slowly slide your finger up until you’re happy with the brightness.
You can see this tip in action by looking at the two photos above, the photo on the left was taken without any changes to its brightness, while I used the tip above to increase the brightness.
#5: Keep Practicing!
Finally, we’ll share with you our #1 tip to becoming a better photography…. Practice, practice, and more practice! The more you take photos, the more you’ll find out what angles work best, learn new techniques, and best of all – become more accustomed to using your camera (whether it’s an iPhone or a DSLR).